The Self-Builder Diaries Chapter Five: Working with the Plot
It came as a surprise to us that, if your boundary is a fence or a kerb, or even a river, there is no problem, but if it’s a wall you have to have a Party Wall Agreement, that is to say a survey (more cost) by a specialist, leading to a Party Wall Award which dictates how you must deal with the wall.
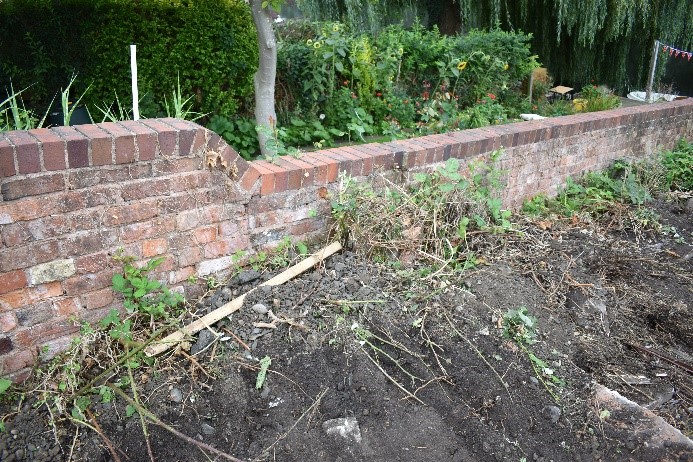
It happened our eastern boundary was a wall – an old, rather crumbly brick wall, which turned out to be built on a foundation of loose rubble.
Party Wall surveyors are scarce. All the local surveyors we contacted said they don’t do that. Finally we got a lead on someone who had retired from one of the surveyor companies but was still qualified to do it.
To our surprise, his fee was less than we anticipated, and, even more surprising, the neighbour agreed to accept him to act for both of us, rather than engaging another surveyor at our expense.
Of course the survey involved digging trial pits to investigate the wall’s foundations, so that was another piece of work to be done, (more cost) but in the end we got the Award made without too much difficulty.
The Award required us to stabilise and repair the wall, which would mean underpinning it at least in part, and repointing it to match the existing mortar. All that required a Risk Assessment and Method Statement by a Structural Engineer, so the execution became another operation in its own right.

The Public Footpath
Another surprise was to find that our tiny bit of land contained a Public Right of Way. It was entirely within our boundaries with no public access from outside, with one end at the river bank and the other behind a locked gate. Nevertheless, rules is rules and we had to get a temporary closure order for the path while the building work is going on.
Of course there is a fee payable to the Council for the closure order, and it only lasts six months, so we will need an extension with a further fee.
By this time we were so used to being hit with unexpected costs that we just accepted it as inevitable.
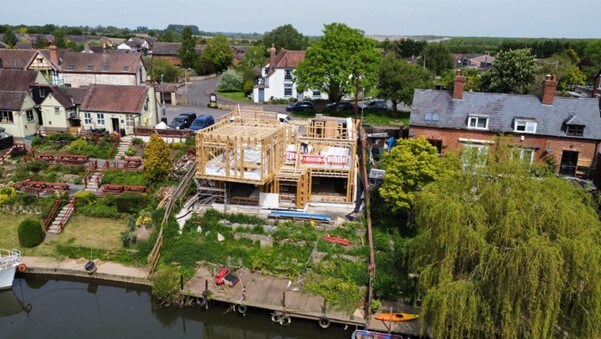
Foundations

The Ground Condition survey, with its boreholes and trial pits, had revealed that, under a surface layer of topsoil and, in places, rubble, the substrate was something called “Mudstone”. To us that is a very stiff clay, but apparently it provides a stable base on which to build.
Because of the steep slope and partially subterranean layout, our main concern was to resist the side force from the up-hill ground, including the road, and to anchor the house to prevent it sliding down the hill into the river.
First thought was a piled retaining wall with the house in a “pocket” behind it anchored with screw piles. We discounted using driven piles because of the risk to adjacent buildings from the vibration, so that left bored, contiguous concrete piles. That was going to be vastly expensive.
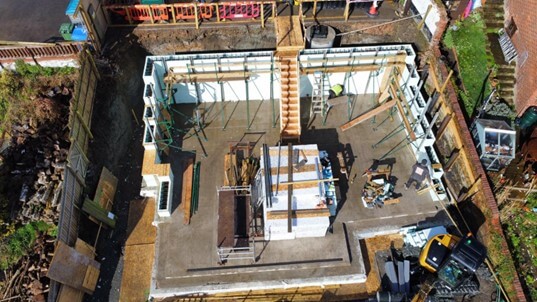
After a lot of agonising, our structural engineer came up with the proposal to use a raft foundation with the up-hill wall acting as a retaining wall. The raft is anchored to the ground by a shear key, which is a downward projection running almost the full width of the underside of the raft, cut into virgin ground and filled with concrete. The whole raft plus shear key is a monolithic reinforced concrete slab.
The fallout from that is that the up-hill wall of the lower storey has to be masonry, not timber frame. We achieved the necessary performance by using an ICF (insulated concrete formwork) wall, tapering down to ground level on the down-hill side.
To achieve Passivhaus levels of thermal insulation we chose Isoquick formwork for the slab and Nudura ICF for the wall.
Chapter 6
With everything in place, find out how we started the build in Chapter 6.